Tuesday, March 22, 2011
Digital Apple Juice
If you need to know anything about Macs, I suggest you just go ahead and start here, because if you don't, chances are you will end up here. Pretty much anything Apple or digital Imaging related can be found there. I now consider Digital Apple Juice pretty much my online photographic Swiss Army Knife.
One last thought and then I'll give you the URL. Be sure to check out Robbie Lacombs article on Composite Art. If you have not seen her work, you are missing out on one of the best Photo Composite Artist in the world! I kid you not, some of her composites just turn me into a zombie. I can and have sat and looked at just one of her photos for an hour admiring it in part and trying to figure out what all the elements are...and I'm really good at finding Waldo! Ok here is the url...http://digitalapplejuice.com/ GO!
Friday, March 18, 2011
Royalty Free is not Free
Kevin Vandivier
Thursday, March 17, 2011
Lighting with FourSquare
Every year I attend the Southwestern Photojournalism Conference in Ft. Worth, Texas. Every year this conference recharges my batteries and inspires me. This years conference was incredible and will be the subject of a future writing. Today, I want to touch on last years conference when one of my all time favorite photographers spoke, Dave Black. Not only is the man an amazing photographer, he is a wonderful person with some pretty good wisdom. I'm hoping soon to write about Dave in this blog with his permission. Stay tuned for that.
Last year Dave introduced everyone to a cool little item called the Four Square. This little tool is very cool and a must have for those of you who like lighting with hand flashes. I traded my masses of Dynalights and packs in for Nikon Smartflashes a few years ago and never looked back. What FourSquare does is hold four flashes which is great for increasing your lighting output. Which comes in handy when shooting in the bright of the day. here's a link and few more shots using this wonderful tool. Oh yeah, I don't work or represent this company or gain anything for bragging it up. I just love well thought out and useful photographic tools. I rank this one up there with the Bogen's Magic Arm! Here's the link...http://www.lightwaredirect.com/ ...and a few more photos...
Wednesday, March 16, 2011
PERSONAL PROJECTS
I'm a big believer in personal projects for photographers. The main reason for this is it keeps the creative juices flowing. Many of my personal projects have also turned into actual assignments. For example, I just found out a Magazine called Christianity Today wants to buy my photos for a story they are doing on refugees in the U.S. This has been a project I've been shooting on for about three years now.
Here's what I do starting a project. First I must have a personal interest in the subject. Regardless of how popular the subject might be, if my heart is not in it, then neither will my commitment to do what it takes to complete the project. That way, you will be shooting for yourself and not others. Whatever you like, go for it.
Like all communication, the more you can address the who, what, when, why and where questions, the better. So, as you prepare for starting to shoot, think about how to visually communicate the message of the story.
If your project is about some natural beauty like mountains, then you may want to first decide which mountains you want to shoot and from what angle. I like to shoot subjects many others have done before me in ways few before me have done. Most mountains are shot in clear sky conditions. So, first I'll wait for a day with clouds that will give me some dramatic sky structure. Then I decide the time of day. If most shoot at dawn, then I'll shoot at dusk. If most shoot at dusk, then I'll shoot at dawn, etc. In short shoot them in a unique and different way than others have.
If your project is about people or a person, then your approach will be different than when just collecting a series of beautiful shots. You will want to actually tell a story with photos. You'll want to shoot your subject loose and wide to show their surrounding environment. You'll also want to shoot closer to isolate your subject but still leave a sense of their environment. Finally you'll want to shoot your subject up close to provide details that reveal intimate info for the viewer.
All this takes time, but if you stick with it, you will in the end collect some great shots and continue to grow as a photographer. My workshop "The Art of Telling Stories" is a great workshop to take for learning and sharpening these skills. As an award winning former photo editor for Texas Highways Magazine, I'm just the person you want teaching you these skills. Here's a link in case your interested...http://www.texasphotoworkshops.com/node/222
Tuesday, March 15, 2011
Covering Hurricanes
Monday, March 14, 2011
TP&W Cover continued
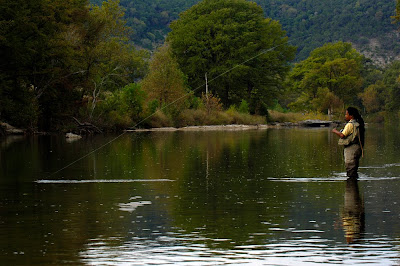
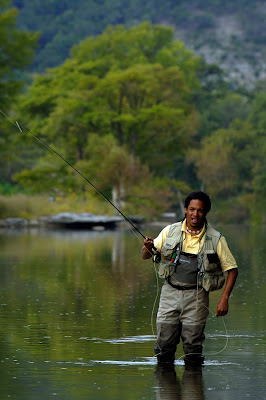
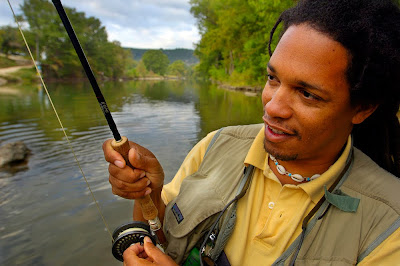
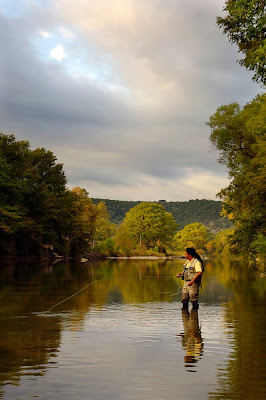
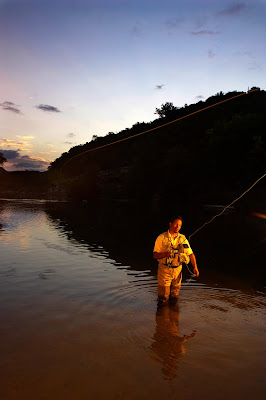
I felt like it would benefit all if I also posted here many of the photos submitted for the request so you can see what kind of variety was sent. Along with the cover, the magazine also selected another version of the photo used as a full page photo inside the story. For this photo, I shot with the white balance set for daylight and used a warming gel on the flashes. However, I positioned the one light at about the 340 degree mark. The photo had a completely different look, even though it was basically the same shot published for the cover. This is one reason why I usually always change my lighting package up when shooting assignments. It many times will lead to more sales. The magazine also used the cover for their online edition and in the end hundreds of dollars was sent to my mail box.
As I mentioned before, I teach this stuff in my workshop called Masters of Light, which is without question one of the best lighting workshops offered. Here is a link...http://www.texasphotoworkshops.com/node/212 I also teach many of my lighting techniques on our expeditions. The next one up is Glen Rose, Texas and it will be an amazing workshop. Here is a link to that one as well...http://www.texasphotoworkshops.com/node/222
God be with you all!
Sunday, March 13, 2011
TP&W Cover
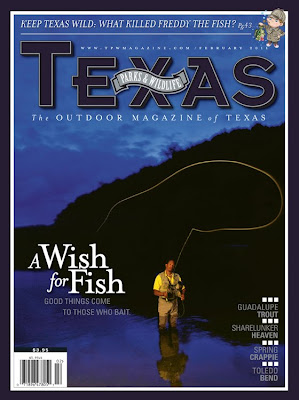
One of my favorite things in this world is mailbox photography money! Recently, one of the magazines we submit stock images to upon their request is a wonderful little pub called Texas Parks & Wildlife Magazine. The love to use images big and the design of the magazine is really nice. In February, they wisely chose the above image which was originally shot for National Geographic Adventure Magazine. A lighting package I’ve used since the mid 90’s that Joe McNally made himself famous for was chosen for this shoot.
To start with, my camera white balance was set on tungsten. Some of you are asking why would a photographer do that when shooting outside? Isn’t tungsten used for indoors? Normally yes! However, the color temperature reaction is a heavy shift blue. Add underexposing a stop and you end up with what you see in the background. This part of the river is pretty shallow with deep channels running through it so my Nikon flashes were attached to stands and placed in the river with us. Since my camera was set for tungsten light, a CT Orange conversion gel was needed to convert the daylight balanced light coming from the flash to a tungsten balance so the flashes light photographed white.
Finally, one flash was used to light the subject and it was placed about the 140 degree mark. For me, that scrapping light/angle of incidence is what I was going for, which helped illuminate the fly line whipping in the air as it is being cast. So, with the shutter, I controlled the exposure of the background and with the aperture I controlled the exposure of the flash. This is called dragging the shutter. At 100 ISO, I shot at 1/3 of a second @ F 5.6.
Ansel Adams always talked about seeing the image first in your minds eye and then shooting it. Most of us know that shooting the image is only half the job. Superior darkroom skills also are required to finalize the photo as you saw it originally in your minds eye! That said, for this image, the photo needed very little darkroom work. The sky was burned down a little to achieve that rich looking blue. You can learn more about my lighting techniques via my photography workshops or one on one mentoring programs.


